Safety Puck Firmware Update Process
Note: You must know your WAM's type before beginning this process. See WAMTypes to determine your system's type.
Step 0: Determine Correct Firmware Version for Your Safety Puck
Refer to the following table to find the correct version:
| WAM Version | Firmware File |
| WAM-OA | puck2.out.r39b.noenet.opt |
| WAM-O[B|D|E] | puck2.out.r39b.enet.opt |
| WAM-MA | puck2.out.r102.noenet.mag |
| WAM-MB | puck2.out.r102.enet.mag |
| WAM-MD | puck2.out.r119.enet.mag |
| WAM-ME | puck2.out.r197.enet.mag |
| WAM-H | puck2.out.r102.enet.mag |
Use btutil to determine the current firmware version on your safety puck. If it is already the correct version, there is no need to continue with these instructions.
Step 1: Connect to the Safety Puck over Serial
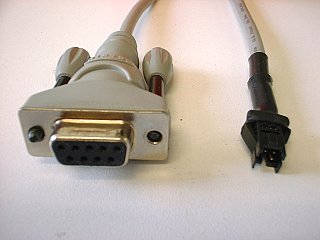
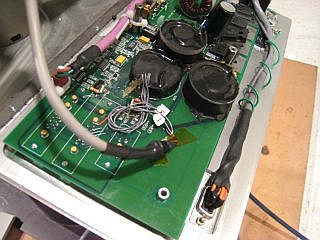
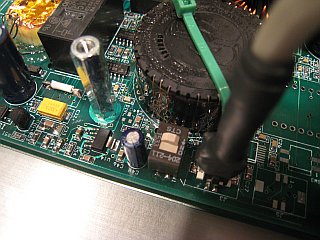
If your system matches type WAM-xA, connect the serial cable inline with the serial download adapter to the safety board. See this picture for reference.
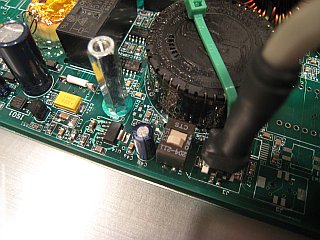
If your system matches type WAM-xB, connect the serial cable to the connector near the safety puck and flip the nearby switch to the "ON" position (away from the puck).
If your system matches type WAM-xD, wait for further instructions.
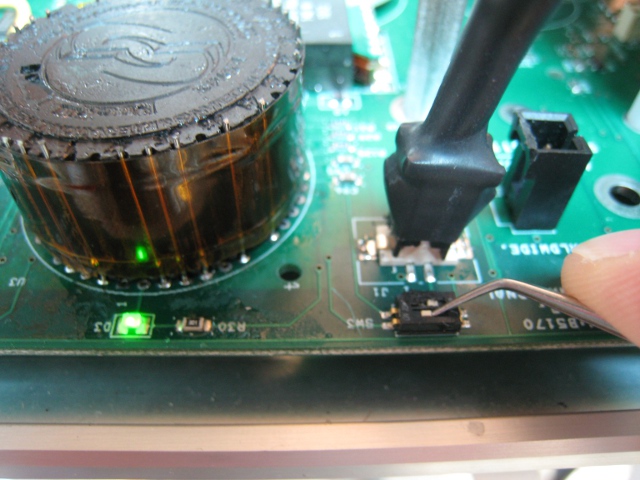
If your system matches type WAM-xE, connect the serial cable to the connector near the safety puck and flip the nearby switch to the "ON" position (toward the puck).
Step 2: Set Up the Computer
Connect the other side of the serial cable to COM1 of a Windows PC.
Turn on main power to the WAM
Download F28xxConsole.exe
Step 3: Flash the Firmware
Under MS Windows, quit any programs that may be using the COM1 serial port. Simultaneously drag puck2mon.out.r9.c20 and your correct firmware file (from above) onto F28xxConsole.exe
NOTE: Some Safety Boards with older pucks may require the 32MHz version of monitor: puck2mon.out.r9.c32
Wait for the download to complete (about 4 minutes)
Turn off main power to the WAM
Step 4: Replace the Serial Cable
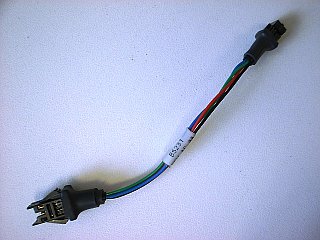
If your system matches type WAM-xA, For Type A: Remove the serial download adapter- connect the serial cable directly to the safety board
If your system matches type WAM-xB, Flip the nearby switch to the "OFF" position (towards the puck).
If your system matches type WAM-xD, wait for further instructions.
If your system matches type WAM-xE, flip the nearby switch to the "OFF" position (away from the puck).
Set Safety Firmware Defaults
Launch TeraTerm/Hyperterminal (9600 baud, no parity, 8 bits, 1 stop bit, no flow control)
Turn on main power to the WAM. You should get a prompt (=>). Type the following commands in sequence, each followed by <Enter>. A mis-typed command will NOT result in an error message, so type carefully! Note that this assumes you are using a verified 48.0 VDC power supply. Following these instructions with a different supply could damage your WAM, please contact us for custom instructions in this case.
- SET X1 2000
- SET VNOM 48
- SET SAFE 4 (this is necessary, do not skip this step!)
- SET SAFE 5
- FIND VBUS
- SET SAFE 0
- SET VOLTL1 22
- SET VOLTL2 19
- SET VOLTH1 54
- SET VOLTH2 57
- SET GRPA 1
- SET GRPB 2
- SET GRPC 3
- SAVE
- RESET
- GET VNOM (should be 48, else SET and SAVE it again)
- GET VOLTL1 (should be 22, else SET and SAVE it again)
- GET VOLTL2 (should be 19, else SET and SAVE it again)
- GET VOLTH1 (should be 54, else SET and SAVE it again)
- GET VOLTH2 (should be 57, else SET and SAVE it again)
- GET GRPA (should be 1, else SET and SAVE it again)
- GET GRPB (should be 2, else SET and SAVE it again)
- GET GRPC (should be 3, else SET and SAVE it again)
- Turn off main power to WAM